Looking for free miter saw table plans in PDF format? You’ve come to the right place! A miter saw table is an essential tool for any DIYer or woodworker, providing stability and accuracy for your cuts. But pre-built tables can be expensive. That’s where free plans come in, allowing you to build your own custom table that fits your needs and budget.
This comprehensive guide will explore everything you need to know about finding and using free miter saw table plans, empowering you to tackle your next woodworking project with confidence.
Why Choose a DIY Miter Saw Table?
Building your own miter saw table offers several advantages:
- Cost Savings: DIY tables are significantly cheaper than buying pre-made options, especially if you utilize readily available materials.
- Customization: Tailor the table’s size, features, and storage options to your specific needs and workflow.
- Durability: Using quality materials ensures a sturdy and long-lasting table that can withstand heavy use.
- Skill Development: Building a miter saw table is a rewarding project that enhances your woodworking skills.
Finding Free Miter Saw Table Plans – PDF Downloads
The internet is a treasure trove of free woodworking plans, including various miter saw table designs. Here are some reliable sources to check:
- DIY and Woodworking Websites: Websites like Instructables, Family Handyman, and Woodworking for Mere Mortals offer a wide selection of free plans, many with detailed instructions and user reviews.
- Online Forums: Online woodworking communities are excellent resources for finding free plans and exchanging tips.
- Social Media Platforms: Pinterest and YouTube are great places to discover visually appealing miter saw table designs and tutorials.
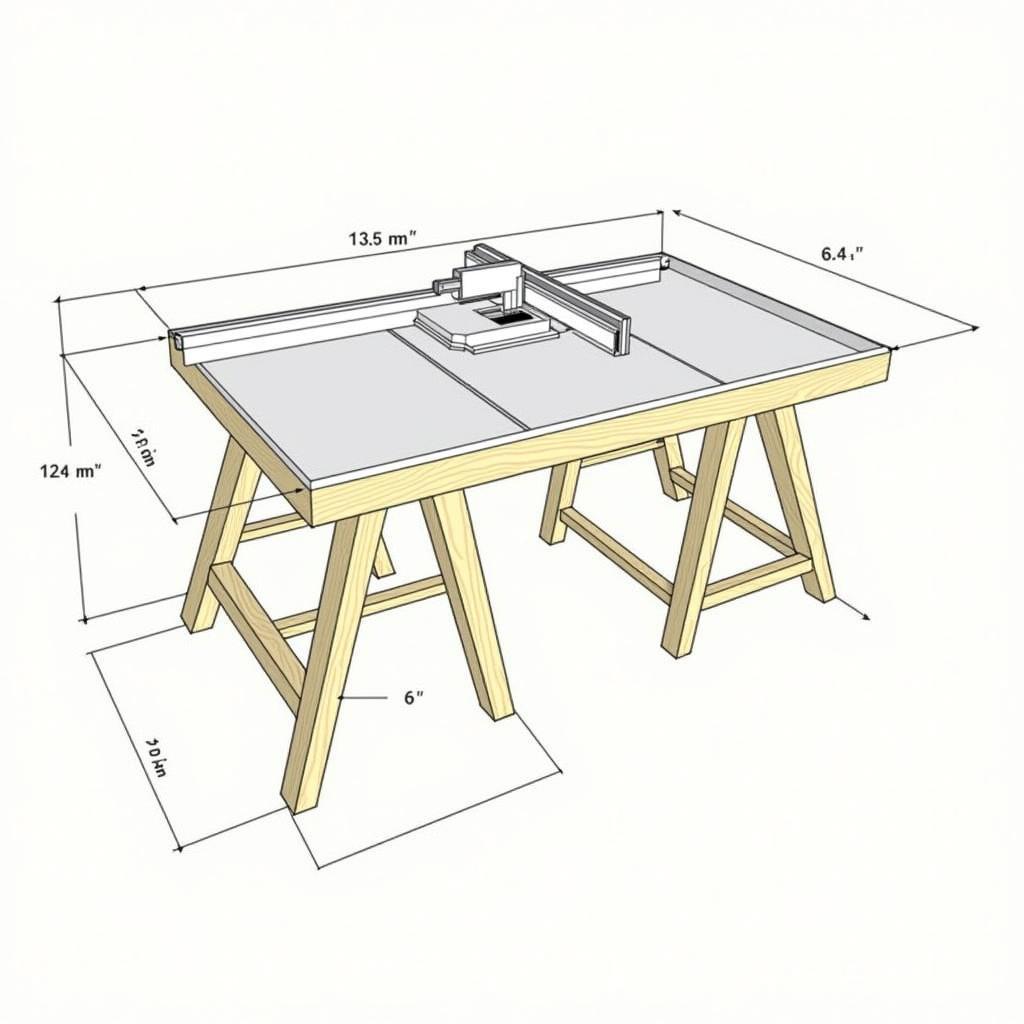 Basic Miter Saw Table Plan
Tips for Choosing Plans:
- Skill Level: Select plans that align with your woodworking experience. Beginner-friendly options often feature simpler designs and detailed instructions.
- Table Size and Features: Consider your available workspace and the types of projects you’ll be working on.
- Material List: Review the required materials and tools to ensure you have everything on hand or can easily acquire them.
- User Reviews and Feedback: Look for plans with positive reviews and comments from others who have built the table.
Understanding Miter Saw Table Plans
Once you’ve found suitable plans, take some time to familiarize yourself with the following aspects:
1. Material List and Cut Diagram:
The plan should include a detailed list of materials with their dimensions. A cut diagram visually represents each piece you’ll need to cut, minimizing waste and ensuring accuracy.
2. Step-by-Step Instructions:
Clear and concise instructions are crucial for a successful build. Look for plans with detailed steps, accompanied by illustrations or photographs for better visualization.
3. Assembly Diagram:
An assembly diagram provides a visual guide for putting all the pieces together. It outlines the order of assembly and highlights any critical connections.
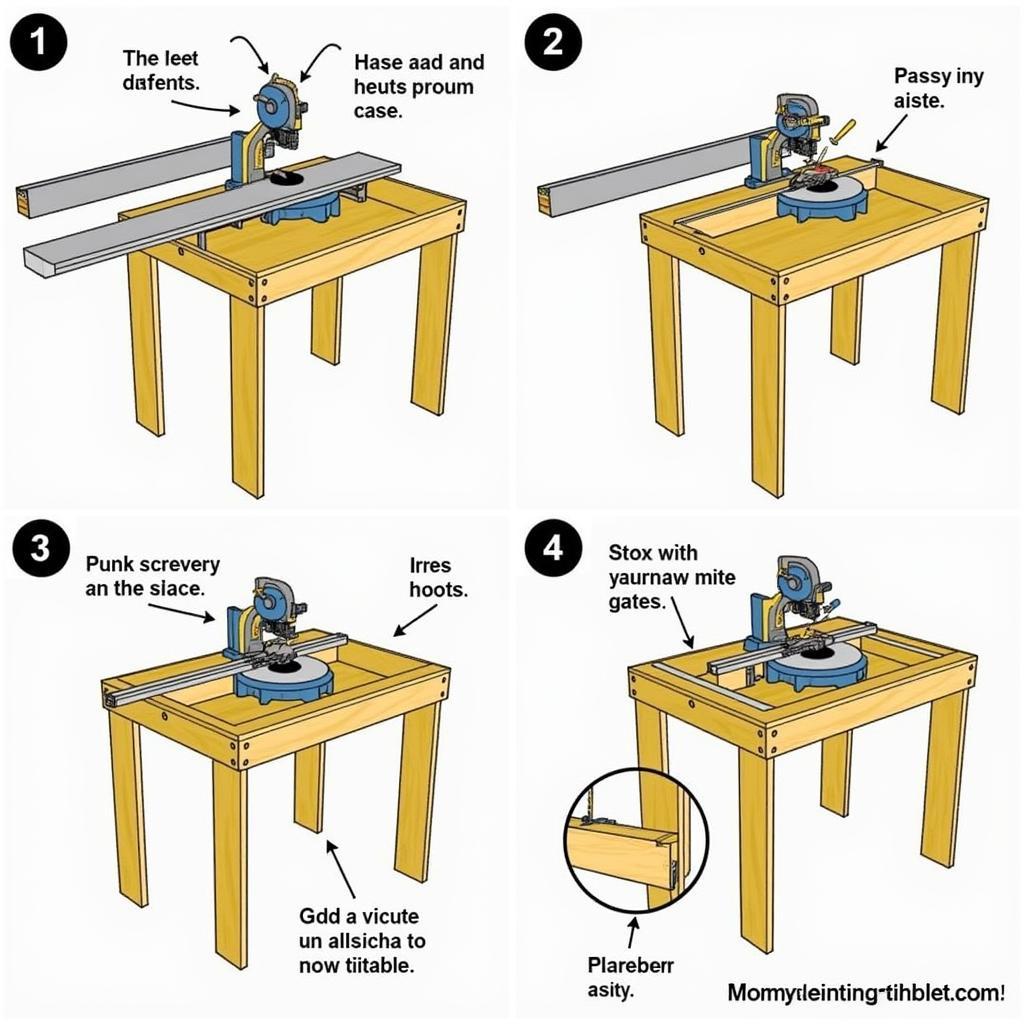 Miter Saw Table Assembly Steps
4. Safety Precautions:
Woodworking involves inherent risks. Reputable plans will emphasize safety precautions throughout the building process, including wearing appropriate safety gear and using tools correctly.
Essential Tools and Materials
Before you begin building, gather the necessary tools and materials. While specific requirements vary depending on the chosen plan, common items include:
Tools:
- Miter saw
- Circular saw or table saw
- Drill and drill bits
- Measuring tape
- Speed square
- Clamps
- Safety glasses
- Hearing protection
Materials:
- Plywood or MDF for the tabletop
- Dimensional lumber for the frame and legs
- Screws and nails
- Wood glue
- Finish of your choice (paint, stain, or sealant)
Building Your Miter Saw Table
With your tools and materials ready, follow these general steps to build your miter saw table:
- Cut the Tabletop and Frame: Refer to the cut diagram and use your circular saw or table saw to cut the tabletop and frame pieces to size.
- Assemble the Frame: Attach the frame pieces using wood glue and screws, ensuring square corners and a level surface.
- Attach the Tabletop: Secure the tabletop to the frame with screws, countersinking them for a flush finish.
- Install the Miter Saw: Carefully position your miter saw on the tabletop and mark the mounting holes. Drill pilot holes and secure the saw with bolts and nuts.
- Add Optional Features: Consider incorporating features like fence systems, stop blocks, dust collection systems, and storage shelves to enhance the functionality of your table.
- Sand and Finish: Sand all surfaces smooth and apply your desired finish to protect the wood and enhance its appearance.
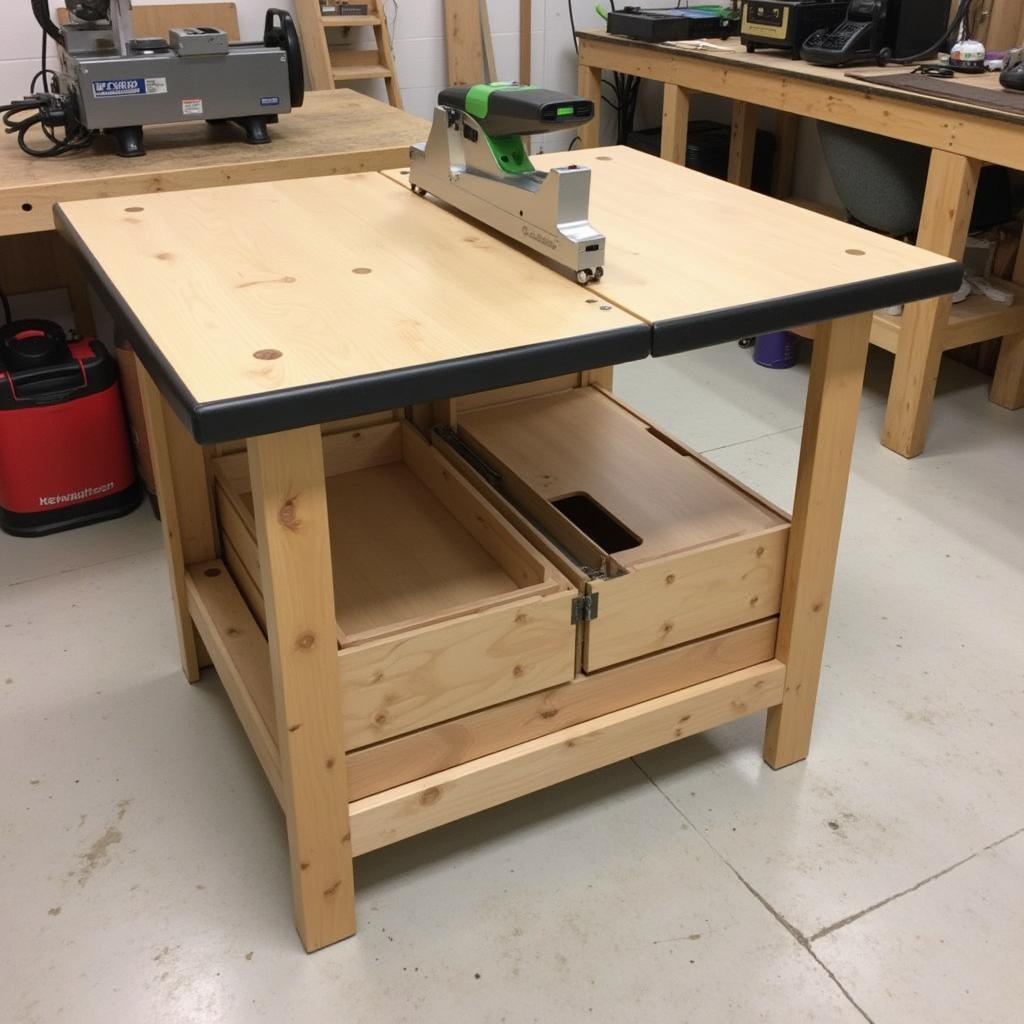 Finished Miter Saw Table with Storage
Conclusion
Building your own miter saw table from free PDF plans is a fulfilling and cost-effective way to upgrade your woodworking setup. By carefully selecting plans, understanding the instructions, and following safety precautions, you can create a custom table that meets your specific needs and enhances your woodworking projects for years to come.
Remember to explore the various free resources available online, choose a plan that matches your skill level and project requirements, and enjoy the process of creating a valuable addition to your workshop!